The essential thing to do with an in-depth learning framework is to classify an image with a pre-trained model. This article works out of the box with PyTorch.
1. Head over to pytorch.org for instructions on how to install PyTorch on your machine.
2. Install other dependencies, including a specific commit of torch vision (since things are changing quickly).
pip install git+https://github.com/pytorch/vision.git@f7c78114d7271154ef45391a87aa43f6479f8713
pip install requests
or
pip3 install git+https://github.com/pytorch/vision.git@f7c78114d7271154ef45391a87aa43f6479f8713
pip3 install requests
3. Import packages and hardcode URLs.
import io
import requests
from PIL import Image
from torchvision import models, transforms
from torch.autograd import Variable

LABELS_URL = 'https://s3.amazonaws.com/outcome-blog/imagenet/labels.json'
IMG_URL = 'https://s3.amazonaws.com/outcome-blog/wp-content/uploads/2017/02/25192225/cat.jpg'
The first two imports are for reading labels and an image from the internet. The Image class comes from a package called pillow and is the format for passing images into torch vision. LABELS_URL is a JSON file that maps label indices to English descriptions of the ImageNet classes and IMG_URL can be any image you like. If it’s in one of the 1,000 ImageNet classes, this code should correctly classify it.
4. Initialize the model.
squeeze = models.squeezenet1_1(pretrained=True)
This will download the weights for the SqueezeNet model.
5. Define the preprocessing transform.
normalize = transforms.Normalize(
   mean=[0.485, 0.456, 0.406],
   std=[0.229, 0.224, 0.225]
)
preprocess = transforms.Compose([
   transforms.Scale(256),
   transforms.CenterCrop(224),
   transforms.ToTensor(),
   normalize
])
The specific set of steps in the image processing transform come from the pytorch examples repo here and here. Without these, the classifier will not work correctly.
6. Download the image and create a pillow Image.
response = requests.get(IMG_URL)
img_pil = Image.open(io.BytesIO(response.content))
This is a quick trick for reading images from a URL. You can also read them from disk with Image.open(“/path/to/image.jpg”). One cool thing about pillow images is that if you execute a code cell with the object in jupyter, it will display the image for you.
7. Preprocess the image.
img_tensor = preprocess(img_pil)
img_tensor.unsqueeze_(0)
First, we apply the preprocessing transforms from above; then we use .unsqueeze_(0) to add a dimension for the batch. Any method that ends with an underscore happens in place.
8. Run a forward pass with the neural network.
img_variable = Variable(img_tensor)
fc_out = squeeze(img_variable)
The input to the network needs to be an autographed Variable. We run the forward pass by calling the squeeze model. NOTE: this does not apply the softmax activation function.
9. Download the labels.
labels = {int(key):value for (key, value)
          in requests.get(LABELS_URL).json().items()}
The requests package will parse JSON for us and return a dictionary. But it’s nice for the keys to be integers since we’re looking for the index of the maximum element in fc_out. After this step, labels will look like this:
labels
{0: 'tench, Tinca tinca',
1: 'goldfish, Carassius auratus',
2: 'great white shark, white shark, man-eater, man-eating shark, Carcharodon carcharias',
3: 'tiger shark, Galeocerdo cuvieri',
4: 'hammerhead, hammerhead shark',
5: 'electric ray, crampfish, numbfish, torpedo',
6: 'stingray',
7: 'cock',
8: 'hen',
9: 'ostrich, Struthio camelus',
10: 'brambling, Fringilla montifringilla',
...
}
10. Print the label!
print(labels[fc_out.data.numpy().argmax()])
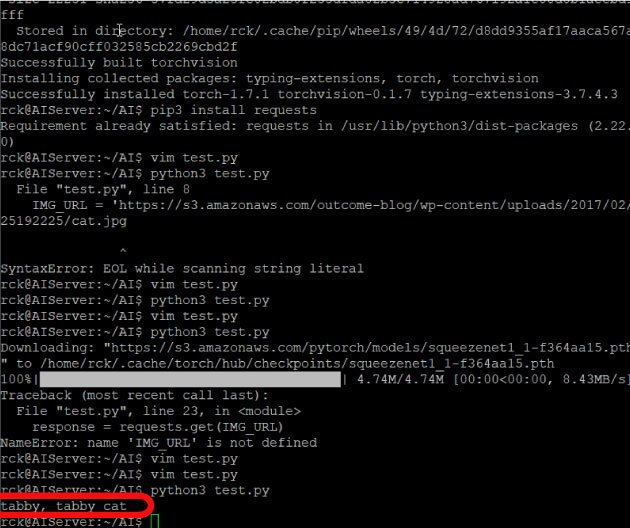
Egyptian cat
Notice, the fc_out variable has a .data attribute. This is a torch Tensor, which has a .numpy() method, which gives us a numpy array. We can call .argmax() on the numpy array to get the index of the maximum element. We find the value with that key from labels, and we get our class label.
PyTorch Classifying an imageCode Completed:
import io
import requests
from PIL import Image
from torchvision import models, transforms
from torch.autograd import Variable

LABELS_URL = 'https://s3.amazonaws.com/outcome-blog/imagenet/labels.json'
IMG_URL = 'https://s3.amazonaws.com/outcome-blog/wp-content/uploads/2017/02/25192225/cat.jpg'

squeeze = models.squeezenet1_1(pretrained=True)

normalize = transforms.Normalize(
   mean=[0.485, 0.456, 0.406],
   std=[0.229, 0.224, 0.225]
)
preprocess = transforms.Compose([
   transforms.Scale(256),
   transforms.CenterCrop(224),
   transforms.ToTensor(),
   normalize
])

response = requests.get(IMG_URL)
img_pil = Image.open(io.BytesIO(response.content))

img_tensor = preprocess(img_pil)
img_tensor.unsqueeze_(0)

img_variable = Variable(img_tensor)
fc_out = squeeze(img_variable)

labels = {int(key):value for (key, value)
          in requests.get(LABELS_URL).json().items()}

print(labels[fc_out.data.numpy().argmax()])


![“Could not run curl-config: [Errno 2] No such file or directory” when installing pycurl installcurlError](https://www.iodocs.com/wp-content/uploads/2018/08/installcurlError-218x150.jpg)
